
ใน HTML5 มีหนึ่งฟีเจอร์ที่มีชื่อว่า <template> ซึ่งเป็น tag ที่ใช้สำหรับการกำหนดโครงสร้างของ HTML ที่ยังไม่ต้องการให้แสดงผลทันทีในหน้าเว็บ เพียงแต่ต้องการเก็บไว้รอให้ใช้งานภายหลัง เช่นเมื่อเรียกใช้งาน JavaScript ก็สามารถดึงส่วนประกอบ HTML จากภายใน <template> ออกมาได้ ซึ่งจะช่วยให้เราจัดการกับเนื้อหาได้ง่ายขึ้น
ลักษณะการทำงานของ <template> Tag
- เนื้อหาภายใน
<template>จะไม่ถูกแสดงใน DOM ต้นแบบของหน้าเว็บ - เราสามารถใช้ JavaScript เพื่อดึงข้อมูลจาก
<template>และเพิ่มลงในหน้าเว็บในภายหลัง - ใช้สำหรับเก็บข้อมูลที่ต้องการแสดงผลตามเงื่อนไขหรือเมื่อผู้ใช้ดำเนินการบางอย่าง เช่น การคลิกปุ่ม
การใช้งานพื้นฐานของ <template>
<!DOCTYPE html>
<html lang="en">
<head>
  <meta charset="UTF-8">
  <meta name="viewport" content="width=device-width, initial-scale=1.0">
  <title>Template Example</title>
</head>
<body>

  <button id="loadBtn">Load Content</button>

  <template id="myTemplate">
    <div>
      <h2>This is a template content</h2>
      <p>Template content will be shown here after clicking the button.</p>
    </div>
  </template>

  <div id="content"></div>

  <script>
    document.getElementById('loadBtn').addEventListener('click', function() {
      const template = document.getElementById('myTemplate');
      const clone = template.content.cloneNode(true);
      document.getElementById('content').appendChild(clone);
    });
  </script>

</body>
</html>
ในตัวอย่างนี้ เมื่อผู้ใช้คลิกปุ่ม “Load Content” จะมีการดึงข้อมูลจาก <template> และเพิ่มเนื้อหานั้นลงใน div#content
การประยุกต์ใช้งาน <template> ในรูปแบบต่างๆ
1. การใช้กับการโหลดข้อมูลที่แสดงผลช้า (Lazy Load Content)
เราสามารถใช้ <template> เพื่อรอให้เนื้อหาบางส่วนถูกโหลดเมื่อจำเป็น เช่น เมื่อผู้ใช้เลื่อนหน้าเว็บลงมาถึงจุดที่ต้องการโหลด
2. การใช้กับ JavaScript และการแสดงข้อมูลแบบ Dynamic
เมื่อเรามีข้อมูลที่เปลี่ยนแปลงอยู่บ่อย ๆ (เช่น ข้อมูลผู้ใช้งาน หรือ รายการสินค้า) เราสามารถเตรียมโครงสร้าง HTML ใน <template> และดึงข้อมูลจาก API มาประกอบกับ template ได้ ดังตัวอย่าง
<template id="userTemplate">
  <div class="user">
    <h3 class="name"></h3>
    <p class="email"></p>
  </div>
</template>

<div id="userList"></div>

<script>
  const users = [
    { name: "John Doe", email: "[email protected]" },
    { name: "Jane Smith", email: "[email protected]" }
  ];

  const userList = document.getElementById('userList');
  const template = document.getElementById('userTemplate').content;

  users.forEach(user => {
    const clone = document.importNode(template, true);
    clone.querySelector('.name').textContent = user.name;
    clone.querySelector('.email').textContent = user.email;
    userList.appendChild(clone);
  });
</script>
ในตัวอย่างนี้ <template> จะใช้เป็นโครงสร้างพื้นฐานที่นำไปใช้สร้างข้อมูลผู้ใช้หลายคนที่สามารถแสดงผลแบบไดนามิกได้
3. การใช้ในการสร้าง Component แบบง่ายๆ
สามารถใช้ <template> ในการสร้าง component HTML แบบ reusable ซึ่งเป็นส่วนหนึ่งของแนวคิด Web Components ที่ใช้ JavaScript และการออกแบบ DOM ดังโค้ดตัวอย่าง
<template id="myCard">
  <div class="card">
    <h3 class="title"></h3>
    <p class="description"></p>
  </div>
</template>

<div id="cardContainer"></div>

<script>
  function createCard(title, description) {
    const template = document.getElementById('myCard').content.cloneNode(true);
    template.querySelector('.title').textContent = title;
    template.querySelector('.description').textContent = description;
    document.getElementById('cardContainer').appendChild(template);
  }

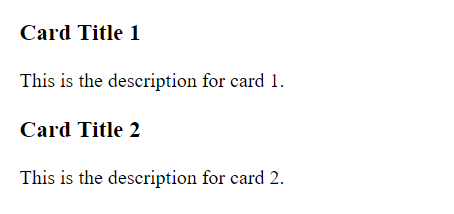
  createCard('Card Title 1', 'This is the description for card 1.');
  createCard('Card Title 2', 'This is the description for card 2.');
</script>
ในตัวอย่างนี้ สามารถสร้าง Card หลายๆ ใบได้โดยการเรียกใช้ฟังก์ชัน createCard โดยข้อมูลในแต่ละ Card จะถูกดึงจาก <template> แล้วแสดงในหน้าเว็บ
4. การใช้ <template> ร่วมกับ Custom Elements (Web Components)
เราสามารถใช้ <template> ในการสร้าง Custom Elements ที่เป็นส่วนประกอบของ Web Components ได้
<template id="myElementTemplate">
  <style>
    .my-element {
      color: blue;
      border: 1px solid #000;
      padding: 10px;
    }
  </style>
  <div class="my-element">
    <slot></slot>
  </div>
</template>

<script>
  class MyElement extends HTMLElement {
    constructor() {
      super();
      const template = document.getElementById('myElementTemplate').content;
      const shadow = this.attachShadow({ mode: 'open' });
      shadow.appendChild(template.cloneNode(true));
    }
  }
  customElements.define('my-element', MyElement);
</script>

<my-element>This is a custom element using template</my-element>
ตัวอย่างนี้แสดงการสร้าง Custom Element ชื่อว่า <my-element> โดยที่มีการนำเนื้อหาจาก <template> มาใช้ใน Shadow DOM ขององค์ประกอบนั้น
สรุป
Tag <template> ใน HTML5 มีประโยชน์อย่างมากในการช่วยให้เราสามารถเก็บเนื้อหาที่ไม่ต้องการให้แสดงผลทันทีใน DOM แต่สามารถเรียกใช้งานภายหลังเมื่อจำเป็นได้ มีการใช้งานที่หลากหลาย เช่น การโหลดข้อมูลแบบ lazy load การแสดงข้อมูลแบบ dynamic การสร้าง reusable component และการใช้งานร่วมกับ Web Components